Showing posts with label sweets. Show all posts

Tuesday, 5 August 2014

Matteo's

Hello Fellow Nom Seekers!

My dear friends V & A were joined in holy matrimony a few weekends ago.  The ceremony was touching and humorously reflected their personalities and the food at the reception was ah-may-zing!  I count myself blessed to have friends who love their food because it guarantees good eating in their company.

The reception dinner was held at Matteo's in North Fitzroy which dabbles in a bit of Italian-Asian fusion.  I am generally wary of fusion cuisines but the folks at Matteo's somehow marry these diametrically opposite food cultures up and create exquisite plates to remember.

To prove my point, here is what we had:

Soft boiled duck egg coated with yuzu curd, organic quinoa salad with avocado, hazelnuts, Myrtleford ricotta and preserved lemon
We got to pick out our own entree and main from a selection.  For entree I could not resist the duck egg.  In general, I love a good boiled egg - it's simple but perfect at the same time.  The accompanying quinoa was complex and interesting with crunchy nuts and creamy avocado and the zing of the preserved lemon.  Yum!

Japanese seafood plate
P ordered the Japanese seafood plate which looked like works of art.  My photography does not do this justice (the room was romantically lit = dim,  which did made it difficult for a hack like me to take a decent shot).  The trio consisted of:  Hiramasa kingfish sashimi, shrimp remoulade with kaffir lime and lemongrass;  tempura Balmain bug tail, wakame seaweed salad and teriyaki glazed smoked eel, coddled egg and potato salad with kewpie mayo.

Crisp skin Cone Bay barramundi, jasmine rice congee with scallop & freekah, finger fennel & mustard green
Being Asian, I am partial to a bit of congee so this was my selection of mains.  The congee tasted of the sea. with chunks of scallops throughout.  I would go so far to say that the congee rivalled my mum's.   The barramundi was nicely cooked ie the flesh still held together.  Sometimes when barras are badly cooked (eg when I cook it) the flesh tends to fall apart.


Seared wagyu beef skirt steak, tamarind beef sauce, panko-crumbed tomato-sambal eggplant, braised snake beans, bell pepper piperade

This was P's mains choice.  He was still reminiscing about the wagyu a week later.  The mains came with sides.  If veggies tasted this good all the time, I would happily be a vegetarian.

tatsoi salad with nashi pear and daikon, dried wasabi peas, wasabi mayonnaise

Fried royal blue potatoes, sesame and furikake salt
The dessert was our own tasting plate with three small tastes:

Five spiced quince & pistachio frangipane tartlet

Coconut milk panna-cotta with plum wine jelly

Warm, dark chocolate fondant pudding
It was a beautiful evening celebrating a beautiful couple *sniff*


After such a lovely experience, I have decided to have my birthday dinner at Matteo's! So hopefully  more pics to come later on this year.

Matteo's Restaurant on Urbanspoon

Until next time...


Wednesday, 21 May 2014

Sugar Free Baking Masterclass at Cupcake Central

Not So Devilish Chocolate Cupcakes

Hello Fellow Nom Seekers!

As some of you may know, I am on the I Quit Sugar program which essentially boils down to the fact that if I want to eat a sweet treat of sorts, I will have to make it from scratch and use sugar alternatives, namely stevia (if you are interested, see my previous posts on sugar free preserved figs and tong yuens).  To date I have never attempted making a sugar free cake with frosting because I thought sugar free icing sugar was as mythical as a leprechaun....until now!

I was very fortunate to be invited to a sugar free baking masterclass at Cupcake Central using Natvia products.  Natvia is made with a blend of organic stevia and erythritol which is a naturally occurring fruit nectar.  Natvia has come up with a sugar free icing mix.  So for sugar free peeps like me, I can literally have my cake and eat it too.  Likewise for the diabetics and those seeking a healthier lifestyle without the sugars and artificial sweeteners.

Natvia Sugar Free Icing Mix (blue) and baking pack (pink)
Sheryl from Cupcake Central demonstrated the ropes of making a pro-batch of cupcakes.  She even shared her recipe for Not So Devilish Cupcakes (see below).  We got to ice our cupcakes using the new Natvia Sugar Free Icing Mix which handled just like regular icing mixes and tasted exactly like sugar...only better for you.  Sheryl has advised that you can substitute Natvia for sugar in a ratio of 1:1 for most recipes.  This is because it is not overpoweringly sweet nor bitter like some sugar free alternatives.

NOT SO DEVILISH CHOCOLATE CUPCAKES, courtesy of Cupcake Central

Ingredients:

  • 1.5C plain flour sifted
  • 0.5C cocoa sifted.  The Cupcake Central uses the Callebaut brand which is 100% cocoa
  • 1C Natvia sifted
  • 1 tsp bicarb
  • 1/4 tsp salt
  • 2 large free range eggs
  • 0.5C vegetable oil
  • 1C cold water
  • 2 tsp white vinegar
  • 1 tsp vanilla extract.  The Cupcake Central uses the Nielsen Massey brand.  
  • You can make an egg free version by omitting the eggs and adding in 2 tsp of vinegar. 
Method:
  • Pre heat oven to 165 degrees C fan forced or 175 degrees C conventional
  • Combine all the dry ingredients in a large bowl or in the stand mixer bowl
  • Whilst beating add oil and vanilla.  Then add water, mixing and scraping down the sides of the bowl as you go.  
  • Add eggs one at a time beating as you go to combine
  • Lastly add vinegar and beat at medium to high speed for 30 seconds
  • Put in little patty cake tins and bake for 18 - 21 mins.  
Icing (enough to ice 12 cupcakes):
  • 125g of unsalted butter.  The Cupcake Central uses New Zealand butter as it is much creamier
  • 225g of Natvia Sugar Free Icing Mix
  • 1 tsp vanilla extrac
  • 1 pinch of salt
  • Combine all icing ingredients using a beater / mixer.  
Ta-dah!  The finished product


Sam and Mark - founders of Natvia.  Apparently the sugar free icing mix took two long years to perfect.  

Sheryl teaching us how the pros ice.  

Ban-Arnie cupcake from Autumn 2014 collection - high protein, sugar free, gluten free cupcakes!  Sheryl advised that Cupcake Central do strive to cater for people who would like a less sinful treat.  Could have easily eaten a dozen.


Some extra Natvia baking tips:

  • Natvia can soak up some of the moisture in your batter, Sheryl recommends using vegetable oil in the cake mix instead of butter or add in a touch more liquid eg 1 - 2 tablespoons extra of milk/water for a batch of 12 cupcakes


Natvia Sugar Free Icing Mix is now available at Coles and selected independent grocers.  It will be in Woolworths in a week.  I can't wait to create my own sugar free frosted cakes at home!


Until next time...

Wednesday, 14 May 2014

Golden Milk


Hello Fellow Nom Seekers!

I came across the health benefits of tumeric whilst researching ways I can help kiddo recuperate from a cold.  Authority Nutrition does a great summary of all the evidence based health benefits of tumeric which then lead me to a wealth of recipes on the internet for Golden Milk - a milky drink made with tumeric.  There were just loads of recipes for this, each with a slight variation.  I ultimately merged a few of suggestions to form my own Golden Milk.

From what I gather, making a tumeric paste from ground tumeric as a precursor to the Golden Milk is the preferred method of Golden Milk production in the absence of fresh tumeric root.  That way, you can be sure that the tumeric in the tumeric paste is thoroughly cooked before you add it to the remainder of the ingredients to make Golden Milk.  I made a batch of tumeric paste and stored it in a jar in the fridge for quick Golden Milk assemblage.  I followed the Herbal Academy of New England's recipe for tumeric paste which is essentially mix 1/4 C tumeric powder to 1/2 C water and cook until paste like.


To make the actual Golden Milk itself, I cobbled together bits and pieces from a variety of recipes:

For 1 cup/serve:

  • 1/4 - 1/2 teaspoon of tumeric paste
  • 2 cup of milk of choice
  • 1 teaspoon of coconut oil
  • 1 grind of black pepper - apparently this assist with the absorption of the curcumin (the good for you bits in the tumeric)
  • a few drops of vanilla extract
  • good shake of ground cinnamon 
  • 1 thin sliver of root ginger
Heat in a saucepan over low heat, stirring until heated through.  Fish the ginger out before serving


What does it taste like? Golden Milk has more of a feel rather than a taste to me.   It feels like being enveloped in a soft comforting duvet.  It feels warming and grounding.  It tastes gingery but not overpoweringly so and the vanilla and cinnamon adds sweetness without actual sugar.

Did it help with kiddo's cold?  In this uncontrolled single subject study, the results are a bit inconclusive - the duration of the cold was not really shortened (about 5 - 6 days) however I believe the severity of the symptoms eg running nose, hacking cough seem to be less than the usual.  Kiddo did not seem to be particularly bothered by her mild symptoms and she did not miss any days of school.  So I like to attribute part of this to Golden Milk.  Or maybe she just had a particularly mild version of the common cold.  Either or, Golden Milk is a comforting hot toddy to have now that the cold weather is settling in.  The colour itself is so uplifting on a dreary winter's night.

By the bye, the tumeric paste apparently can be kept in the fridge for about a fortnight.  I also used the left over tumeric paste to throw in casseroles and even mixed it with butter to spread on a crumpet.

Unti next time...


Sunday, 4 May 2014

Gelato Messina

Hello Fellow Nom Seekers!

Just how good is the ice cream at Messina's?


Good enough to brave a chilly and wet 10 degree C day and rug up kiddo in her winter woollies specifically to go eat the cold stuff.  Winter you see, has not dampened Messina's business.  We were not the only ones swaddled in jackets bravely eating ice cream whilst it hailed outside.  

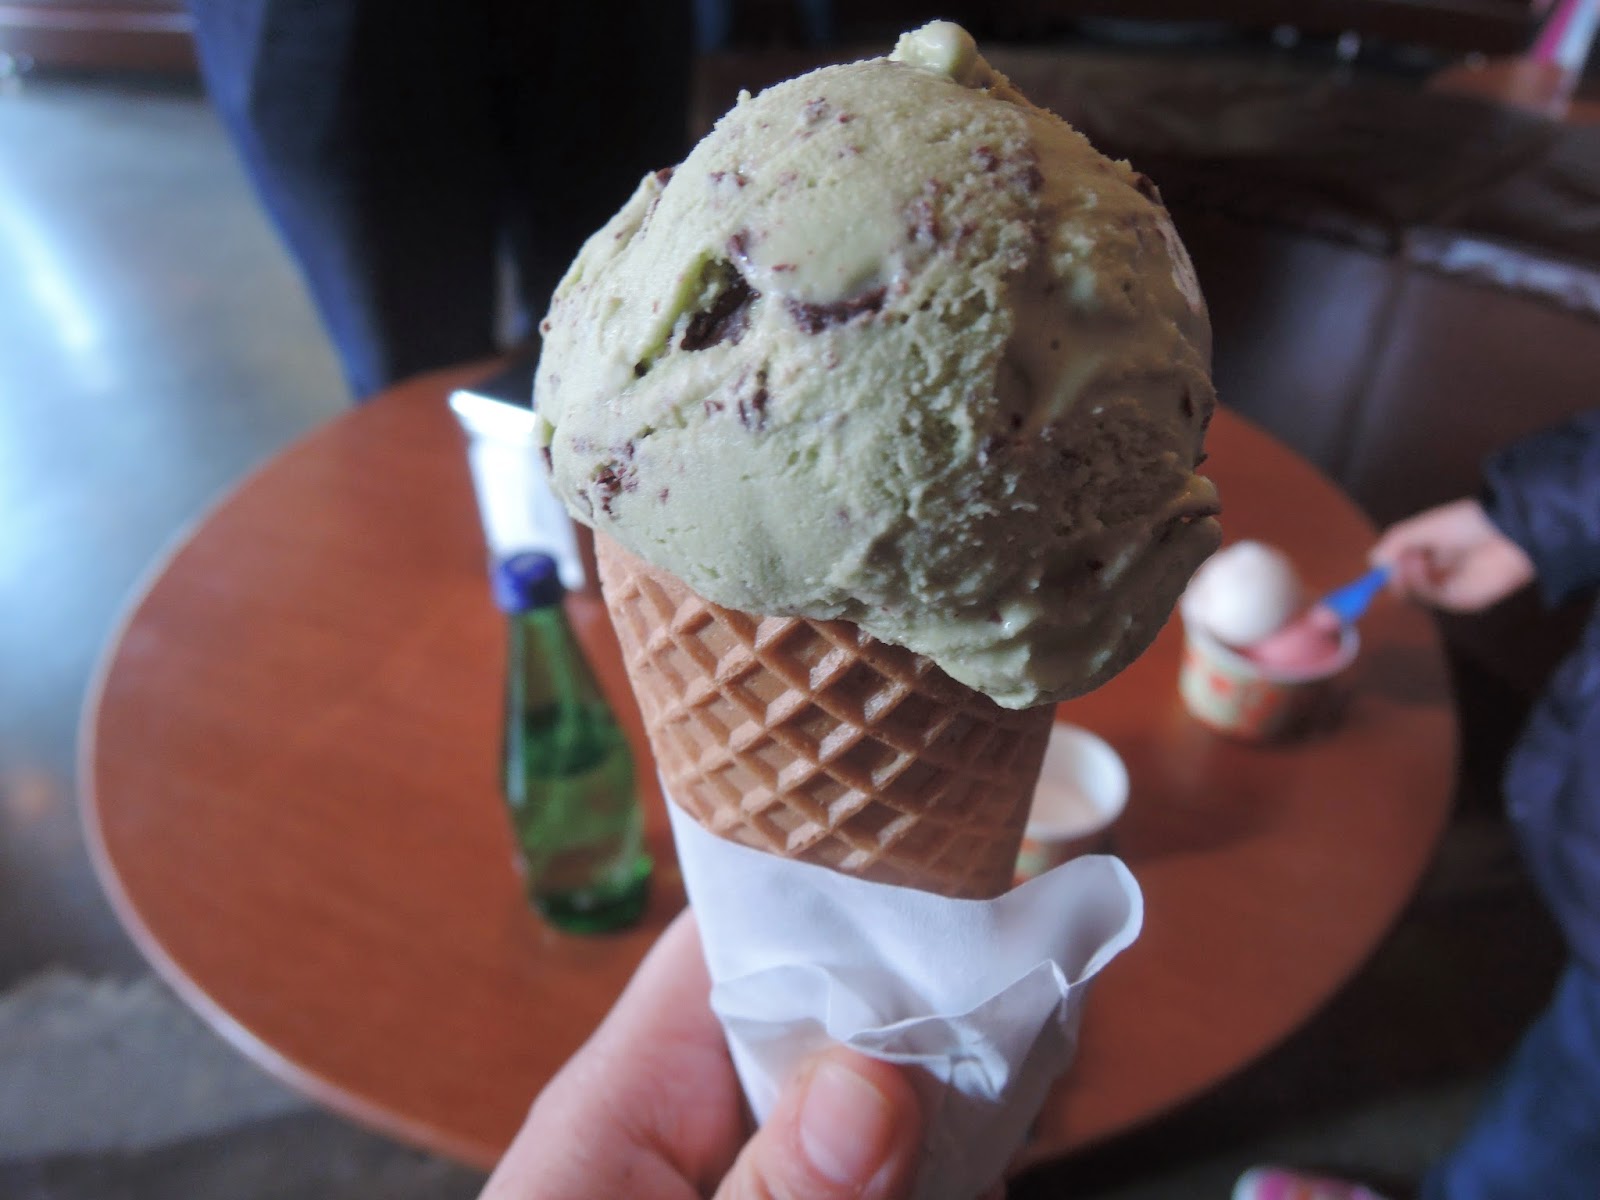
We ordered for kiddo, the choc mint on a waffle cone:


The ice cream had a beautiful texture and smooth creaminess which even kiddo appreciated.  

For the adults we ordered the lychee martini (yum without being too alcoholic) and blood orange gelato.  Both were very smooth on the palate and not at all crystally for a sorbet.  


There were heaps of amazing combo flavours such as:  salted caramel and white chocolate;  pannacotta with fig jam and amaretti biscuit;  pear and rhubarb, just to name a few of the  more interesting ones.  


Plenty of flavours to explore plus a specials board in case you get bored with their standard flavours - this is a place to go come hail or shine for ice cream. 


Gelato Messina Fitzroy on Urbanspoon

Until next time...

Monday, 7 April 2014

Green Tea (Matcha) Icecream


Hello Fellow Nom Seekers!

We have acquired an ice cream maker!  Kiddo requested this as her birthday present from her grandparents which they very generously bought the Cuisinart 2L ice cream maker. It has proved to be more of a present for me as I am the one playing around with it.  So far I've made a few total fails but I have also made a few winners.  One of the most popular, universally-liked-by-adults but not so much by the kids, is my green tea ice cream.  The Cuisinart came with a recipe booklet which had a green tea gelato recipe within however I felt green tea ice cream should be more creamy rather than sorbety.  So I improvised by making a rather luxe vanilla ice cream to which I added loads of matcha tea powder.  The result is a very creamy velvety textured ice cream with the clean 'bite' of the green tea flavourings.

Ingredients to make 2L worth:

  • 600ml of heavy cream
  • 600ml of water
  • 1 cup of full cream milk powder
  • 4 heaped tablespoons of matcha (green tea) powder
  • 1 tablespoon of vanilla extract
  • 3 whole eggs
  • 4 egg yolks
  • 1 cup raw sugar
  • 1 - 2 drops of green food colouring (optional)
Method:
  • Pre freeze the ice cream canister by wrapping it snugly in plastic and putting it in the freezer for at least 24 hours before hand.  
  • Heat the heavy cream, water and full cream milk powder over a medium to low heat for 30 minutes stirring occasionally to present it sticking to the bottom of the pot.  This part I found the most tedious.  
  • Meanwhile using a hand held beater, mix the eggs, vanilla extract and sugar until blended.  Sprinkle in the matcha powder.  Beat again until incorporated. 
  • Once the cream/milk mixture has had its 30 minutes on the stovetop, take 1 cup of the mixture out and slowly pour it into the egg and sugar mixture beating with the hand held mixer all the while.  
  • Once incorporated, pour the egg and sugar mixture into the pot with the remainder of the hot milk and cream.  Turn up the heat to medium low.  Stir vigilantly as the mixture turns custard like with the heat.  The mixture should coat the back of the wooden spoon when done.  I found this took a further 10 - 15 minus to reach this stage at medium to low heat.  
  • At this stage, check that you are happy with the greenness of the mixture.  If you would prefer it more vibrantly green, add a few drops of green food colouring.  
  • Pour the custardy mixture into a bowl and place clingfilm directly on top of the mixture to prevent a milk skin from occurring.  
  • Place mixture into the fridge to cool.  This takes a few hours.  
  • Once completely cooled, churn the custard mixture through the ice cream maker for 25 mins. 
  • Scoop out the ice cream when churned.  This can be eaten as is or it can be frozen for a few more hours for a stiffer texture or to serve later.  If storing this in the freezer, I have experimented and found an airtight shallow but wide container worked best as it minimised ice crystal formation.  Also I stored it with a layer of grease proof paper directly on top of the ice cream to further minimise ice crystal formation.  
  • Take the ice cream out 15 - 20 mins before serving to take the chill off it a bit for a nice scoopable consistency.  
For the kiddos:

As I mentioned earlier, the green tea flavour was not really popular with the kids.  I made a kiddie version by omitting the matcha powder and throwing a few drops of food colouring in the last minute of churning to achieve a rainbow ice cream effect.  


I'm looking forward to concocting a few more less conventional flavours.  Any ideas welcomed!

Until next time...


Saturday, 25 January 2014

WFT?!: Steamed Custard Bao

Hello Fellow Nom Seekers!

Bao or you may know them as 'pao' or 'bun' is the new street food trend in Melbourne.  With places like Wonderbao being a such a big hit as well as baos being a regular feature on the yum cha menu.  

I am particularly partial to a steamed custard bao (Lai Wong Bao).  Anything featuring custard is wonderful in my world.  However I find the custard bao at yum cha or even the ones you buy frozen in the Chinese grocery stores a bit too sweet.  So I tried my hand at making my own and I was quite proud of the way they turned out, bearing in mind I am not a professional chef.  

Just out of the steamer

Custardy interior

I have a steamer oven which makes life so much more easier as I don't have to fiddle around with balancing bamboo steamers over hot boiling water on the stove top.  I also took Jamie Oliver's tip of putting the baos in individual paper muffin patty cases.  This is so that they don't stick to your plate when cooking and it also guides the dough so that it rises up instead of growing sideways into flat discs.  

I have a stock standard dough recipe which I dredged up for this and I used hkjenn's recipe for the custard filling.  
Custard filling - could eat this on its own.  
Bao dough recipe:

Ingredients:
  • 3 tablespoons of raw sugar
  • 1 cup warm water
  • 1.5 tsp dried yeast
  • 3 1/4 cup of strong plain flour
  • 2 tablespoons of olive oil
  • 1 1/2 teaspoons of baking powder
Method:
  • Place sugar, yeast and warm water in a small bowl and let stand until yeast is foamy (approx 10 minutes
  • Sift flour into large bowl and add yeast mixture and oil.  Mix with spoon to combine then tip out on floured surface to knead until dough is smooth and elastic.  
  • Place dough in a clean oiled bowl and cover with a damp tea towel.  Leave to proof for at least 3 hours.  
  • Uncover the dough and punch it down.  Knead again for a few minutes.  
  • Sprinkle baking powder onto the dough and knead it for several minutes until it is evenly incorporated.  
Custard Filling (I doubled hkjenn's recipe and had a little left over for me to eat on its own)

Ingredients:
  • 20g of custard powder
  • 100g of wheat starch
  • 200ml of milk
  • 100g of butter
  • 2 large eggs, slightly beaten
  • 90g of caster sugar
Method:
  • Combine custard powder, wheat starch and caster sugar in non stick pot.
  • Add milk and stir over a low heat until mixed.  Then add butter
  • Let butter melt over the low heat and stir in beaten eggs.  
  • Keep stirring until thickened then turn off heat.  
To assemble baos:
  • Divide dough into 12 even balls then roll out into discs.
  • Add custard filling in the middle and pinch to seal.  I put the seal side down into the muffin patty cases.
  • Put into steamer oven or into a traditional steamer for 10 - 15 minutes.  
Chow down.  

Until next time,
Nom Seeker, Glutt


Friday, 10 January 2014

WFT?! (What's For Tea): Buttermilk Pancakes


Hello Fellow Nom Seekers!

As the old adage goes, the simple things in life are often the best.  This buttermilk pancake recipe is so simple,  it is a 1:1 ratio of practically all the ingredients with the exception of sugar which you add to taste. You can even knock this up in a sleep fog.

Ingredients:
  • 1 cup of self raising flour
  • 1 cup of buttermilk
  • 1 egg
  • 1/2 cup of raw sugar
Method:
  • Mix together with wooden spoon.  Get most of the lumps out.  
  • Melt a little knob of butter in a non stick pan and cook.  
Easy.  


Breakfast of champions


Thursday, 9 January 2014

Tutti Frutti Frozen Yoghurt

Hello Fellow Nom Seekers!

I am still in shock for being charged AUD$14 for two squiddles of frozen yoghurt.  How did this happen?!

Tutti Frutti is an establishment which charges by weight - $2.60 per 100g.  They sell frozen yoghurt in interesting flavours (that's their hook) and they claim to be 98% fat free (further hook although yes, I am aware that fat free does not mean sugar free so it's probably just as bad for you as full fat yoghurt).  They have heaps of interesting toppings to sprinkle on top of your yoghurt in which you help yourself from a self service bar.  All very enticing.

Chocolate and strawberry yoghurt with chocolate buds and Reese peanut butter cup

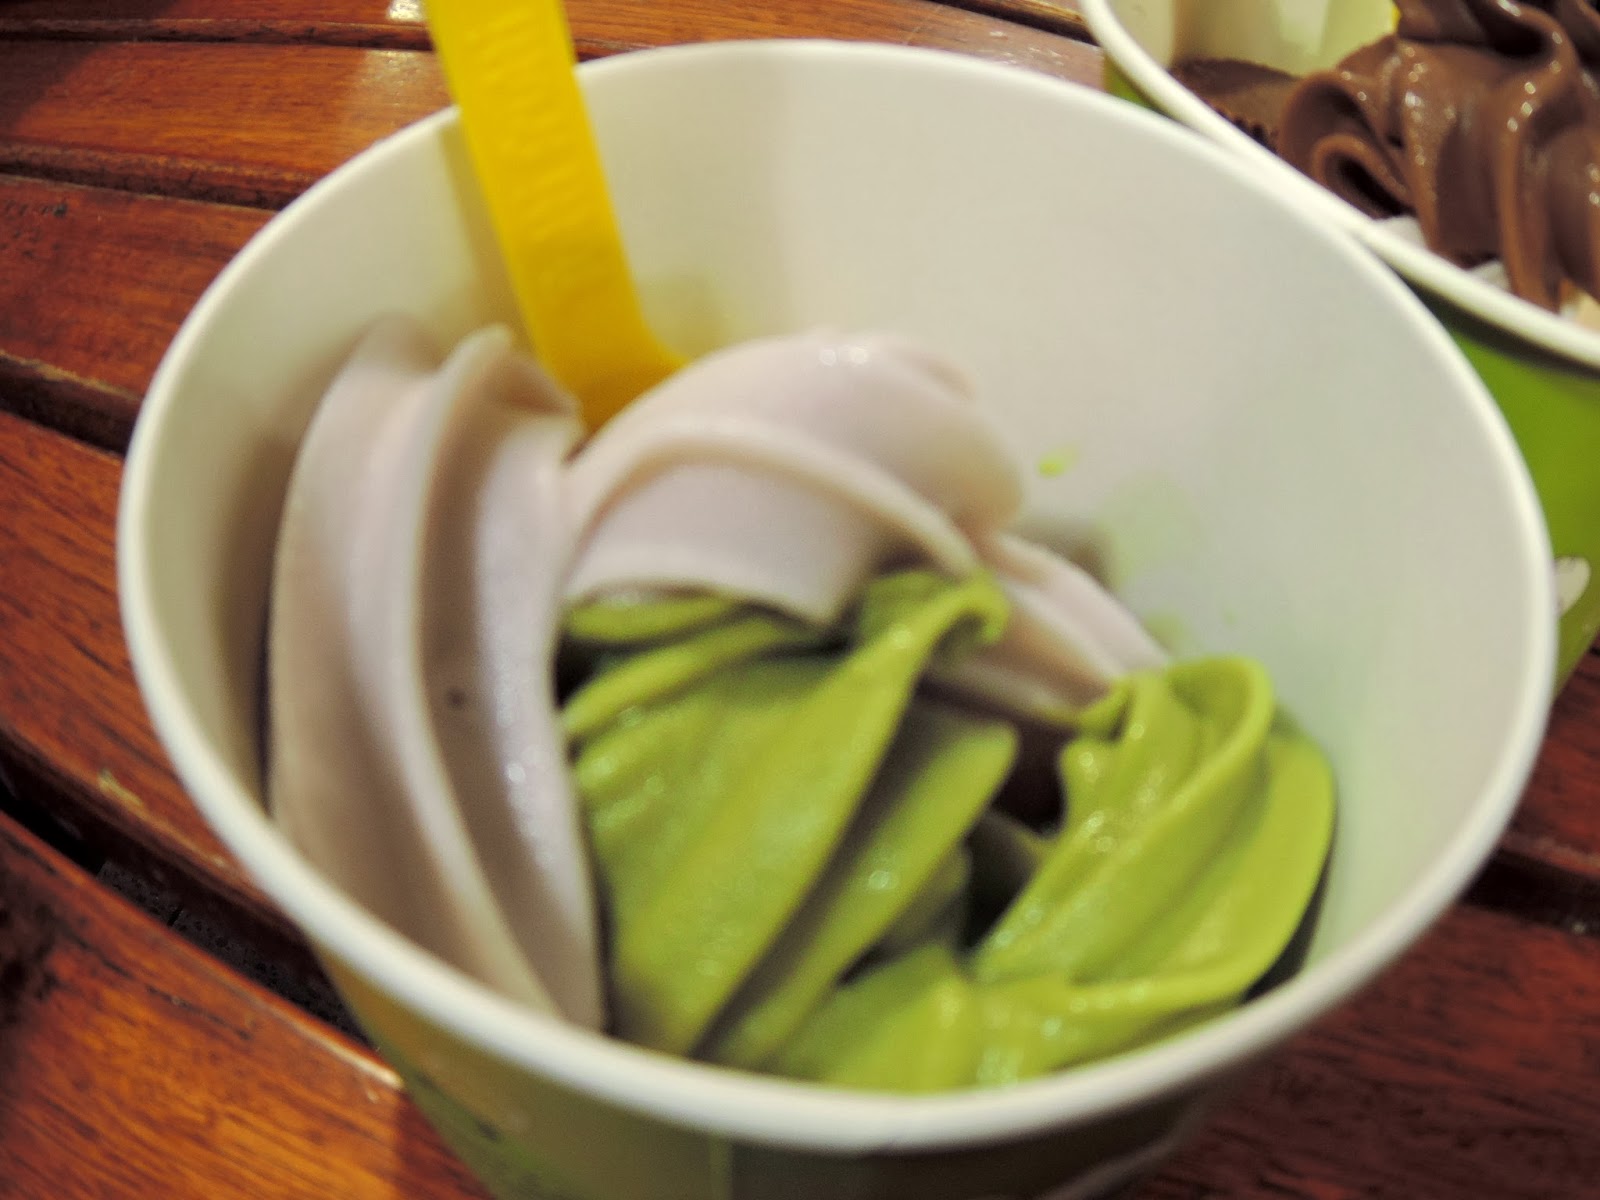
Green tea and taro yoghurt

Candy and chocolate for sprinkling purposes

Fruit options for sprinkling purposes

Self service
So the unsuspecting fool that I am, filled the yoghurt cup with a squiddle of yoghurt (note from pic above, it was a teeny tiny bit) and Bubbachuck had one Reese peanut butter cup and a few chocolate buds on her's yet somehow when our cups were weighed to determine what we were to pay, we were charged $14.  Ay Caramba!  That is some expensive yoghurt.  I am beginning to wonder whether they include the weight of the tub in which case, that is very cheeky.  Maybe I should bring a set of scales with me next time.

The deets:

Location:
Tutti Frutti Frozen Yoghurt
Shop 1-034 Level 1 Urban Market, QV, 210 Lonsdale St, Melbourne  VIC 3000
ph:  03 9663 7066

Costs:
$2.60 for each 100g of yoghurt and topping

Ambience:
Take away

Nom Again:
Probably not willingly but my child seems to like it so I will probably go again begrudgingly.

Tutti Frutti Frozen Yogurt on Urbanspoon

Until next time,
Nom Seeker, Glutt

Friday, 27 December 2013

The Lab Nitrogen Gelato

Hello Fellow Nom Seekers!

The experience at The Lab Nitrogen Gelato is a cross between sitting in a Year 10 chemistry class and watching street theatre.


Nitrogen gelato for the uninitiated, is when an ice-cream is created there and then for you. Liquid nitrogen is used to immediately freeze the ice cream ingredients.  The Lab, plays up on it's mad scientist type setting.  The customer service staff where white lab coats and goggles.  Beakers and funnels hold all the ice cream constituents.  There is considerable showmanship with the making of the ice cream with clouds of liquid nitrogen wafting all over the place.  It's a gimmick and I'm embracing it.  


I ordered a macha green tea ice cream with red bean puree topping for $6.  They only have 6 flavours at a time to choose from but having said that some of the flavours can come gluten free.  As far as ice creams go, it was one of the nicer green tea ice creams I've had.  I just wished it came with more red bean puree.


The deets:

Location:
The Lab Nitrogen Gelato
188 Bourke St, Melbourne VIC
Ph 03 9077 3354

Costs:
$6 per ice cream

Ambience:
Street side al fresco seating available.

Nom Again:
Why not?  Good place to take the kids on school holidays.

The Lab Nitrogen Gelato on Urbanspoon

Until next time,
Nom Seeker, Glutt

Thursday, 26 December 2013

WFT?! - Berry Mocktail

Hello Fellow Nom Seekers!

Today's What's For Tea?! is not really a meal item but more of a refreshing but healthy drink.  I'm all for devious ways of getting more fruit into our diets and this Berry Mocktail of mine does just that.  Unlike fruit juices which lack the fibre, this Mocktail is a fruit puree so all the fibre goodness is intact. Alternatively you can swig some vodka into it for a pleasurable adulterated version.  Each to your own.

Ingredients:
  • a cup of frozen mixed berries (blueberries, blackberries, strawberries)
  • 1/2 cup of cold water
  • 1 peach - stone removed
  • sprig or two of mint
  • 1 tablespoon of Elderflower cordial


Method:
  • Put all ingredients into a blender and mix into a slurry.  I use a stick blender but the traditional blender works fine
  • Kick back and enjoy

Berry Mocktail - refreshing and good for you


Variations:
  • If peaches aren't in season, I use kiwi fruit or passionfruit. 

Until next time,
Nom Seeker, Glutt

Wednesday, 25 December 2013

Recipe Roadtest: Red Velvet Cake

Hello Fellow Nom Seekers!

I suck at baking.  Sorry for my bad language but really there is no other way to describe my ineptitude.  However, I have discovered a new cake recipe that even baking dunces like myself can execute with reasonable success.  Here is my creation!


I'm so proud of it, it's like I gave birth to it.

The cake recipe is from Taste.  Since I am totally incapable of following instructions to the letter, I could not help but tweak a few things.  My recipe is below. 

Ingredients:

For cake:
  • 180g softened butter
  • 1.5 cups caster sugar
  • 1 tsp vanilla extract
  • 2 eggs
  • 2.5 cups of sifted self raising flour
  • 2 tbs cocoa powder
  • 1 cup of buttermilk
  • 1tsp of bicarbonate of soda
  • 1 tbs of red food coloring
  • fresh berries to decorate
  • 1 tsp of white wine vinegar
For icing:
  • 250g of cream cheese
  • 60g of softened butter
  • 1 cup of icing sugar
  • zest of 1 lime
  • juice of 1 lime
Method:
  1. Preheat oven to 180 degrees Celsius.  Grease and line two 20cm round cake tins. 
  2. Beat softened butter and caster sugar together with an electric beater until light and fluffy. 
  3. In a separate bowl, combine eggs, flour, cocoa powder, buttermilk and vanilla.  Add this to the butter and sugar mixture batches at a time beating in between. 
  4. Stir in bicarb, red food coloring and vinegar. 
  5. Pour mixture evening between the two cake tins and bake for 25 minutes or until skewer comes out clean when inserted in the centre. 
  6. Let cakes cool for a few minutes before inverting onto wire rack. 
  7. Make the icing by combining all the icing ingredients
  8. Once cake is cooled, use a quarter of the icing mixture to sandwich the two cakes together.  You can sandwich a few berries in there too.  The remainder and majority of the icing and berries go on top. 
Enjoy!

Until next time,
Nom Seeker, Glutt

Tuesday, 10 December 2013

Coffee Exchange

Hello Fellow Nom Seekers!

I was recommended the bagels from the Coffee Exchange by another fellow nom seeker.  Since I was hankering for a New York bagel experience, I chose the Reuben bagel with caraway seeds.  The Coffee Exchange have a range of bagels with a variety of fillings:  off-the-bone ham, smoked salmon and capers, etc. 


The bagel wasn't a true boiled bagel and was more like a bread roll but nonetheless it was tasty with the sprinkling of caraway.  I ended up toasting the bagel as it felt rather stale so I rationalised I will replace the stale texture with a toasted one.  Once toasted, this was an amazing beast.  The gruyere was melted just so and the silverside was very flavourful and salty.  I would have liked a bit more sauerkraut in my Reuben.  All in all, there was about a teaspoon sized dollop of sauerkraut.  I wanted a bit more of the stuff to balance out the dryness of the bagel.  It was missing the traditional thousand island dressing but it had a tasty home made mayo alternative.  So not a true traditional Reuben but definitely a nice sandwich once toasted. 

On a separate occasion, I tried the crispy chicken roti.  This was better than I thought.  The roti had flecks of coriander in it which was a bit different from your traditional roti.  The crispy chicken strips had a slightly spicy cayenne coating and it was not dry. 


I also tried the carrot cake.  The Coffee Exchange boasts that all cakes are baked on premises and that the carrot cake was apparently a recipe from the hummingbird cafĂ© in the UK.  I love carrot cake and can sometimes be put off ordering one because of the scary thick layer of icing accompanying it.  However this carrot cake only had a teensy wee bit of cream cheese  and pistachio crumbs on top which suited me fine.  The carrot cake was not as carroty as I had hoped but it had a nice gingerbread taste and texture. 


The deets:

Location:
Coffee Exchange
1 Little Collins St, Melbourne, VIC
Ph:  03 9654 5343

Cost:
Approx $15 for bagel and cake.  $11 for the roti. 

Ambience:
Casual dining and takeaway.  Nice al fresco area which is heated during the winter. 

Nom again:
Maybe. 


Coffee Exchange on Urbanspoon

Until next time,
Nom Seeker, Glutt
Related Posts Plugin for WordPress, Blogger...